Case Files
Permissions: cases.read, cases.write
Purpose
App routes: /cases and /cases/:id Case Files persist incident context beyond a chat or browser session. A case links workload and architecture context, investigation chat, findings, changes, evidence snapshots, remediation task, assignee, risk/confidence, and an append-only event timeline.
How to open a durable incident record
- Open Case Files with
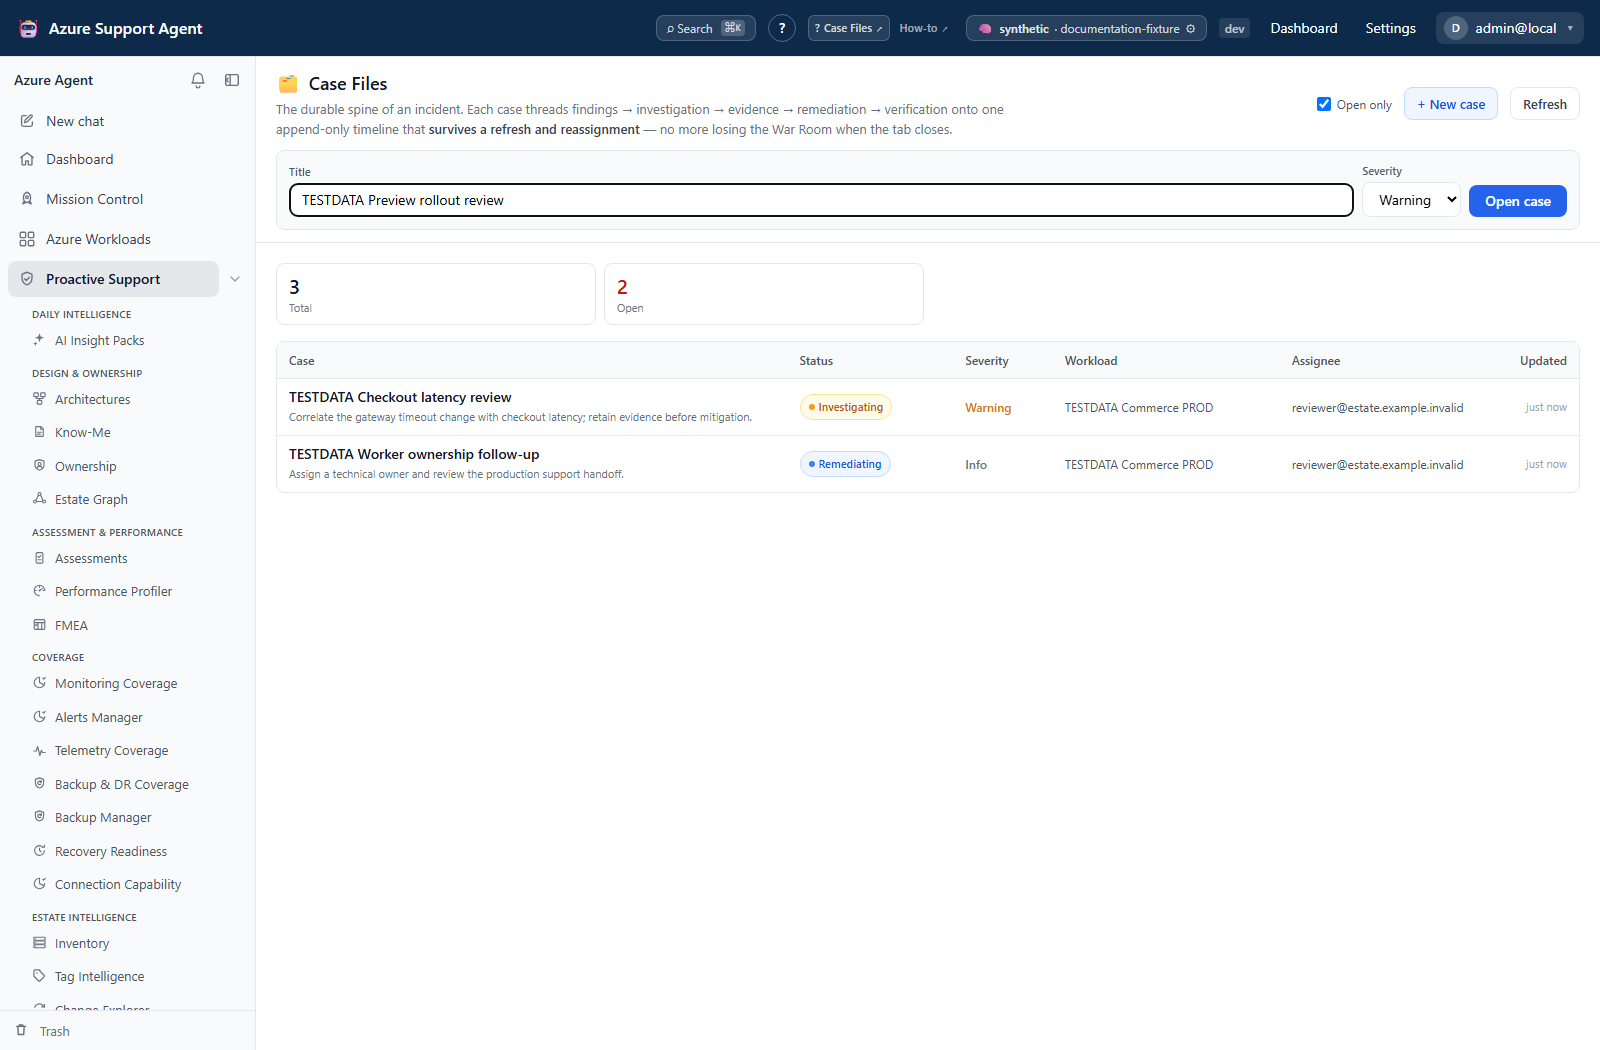
cases.read; usecases.writefor creation, status changes, notes, attachments, or deletion. These permissions concern application records, not Azure resource writes. - Select + New case, enter a concise title such as “Example checkout failure review,” choose a severity, and select Open case. The form supplies title and severity only.
- Add an initial timeline note covering impact, known facts, unknowns, the accountable owner, and verification criteria. Select Add, or press Ctrl+Enter/⌘+Enter.
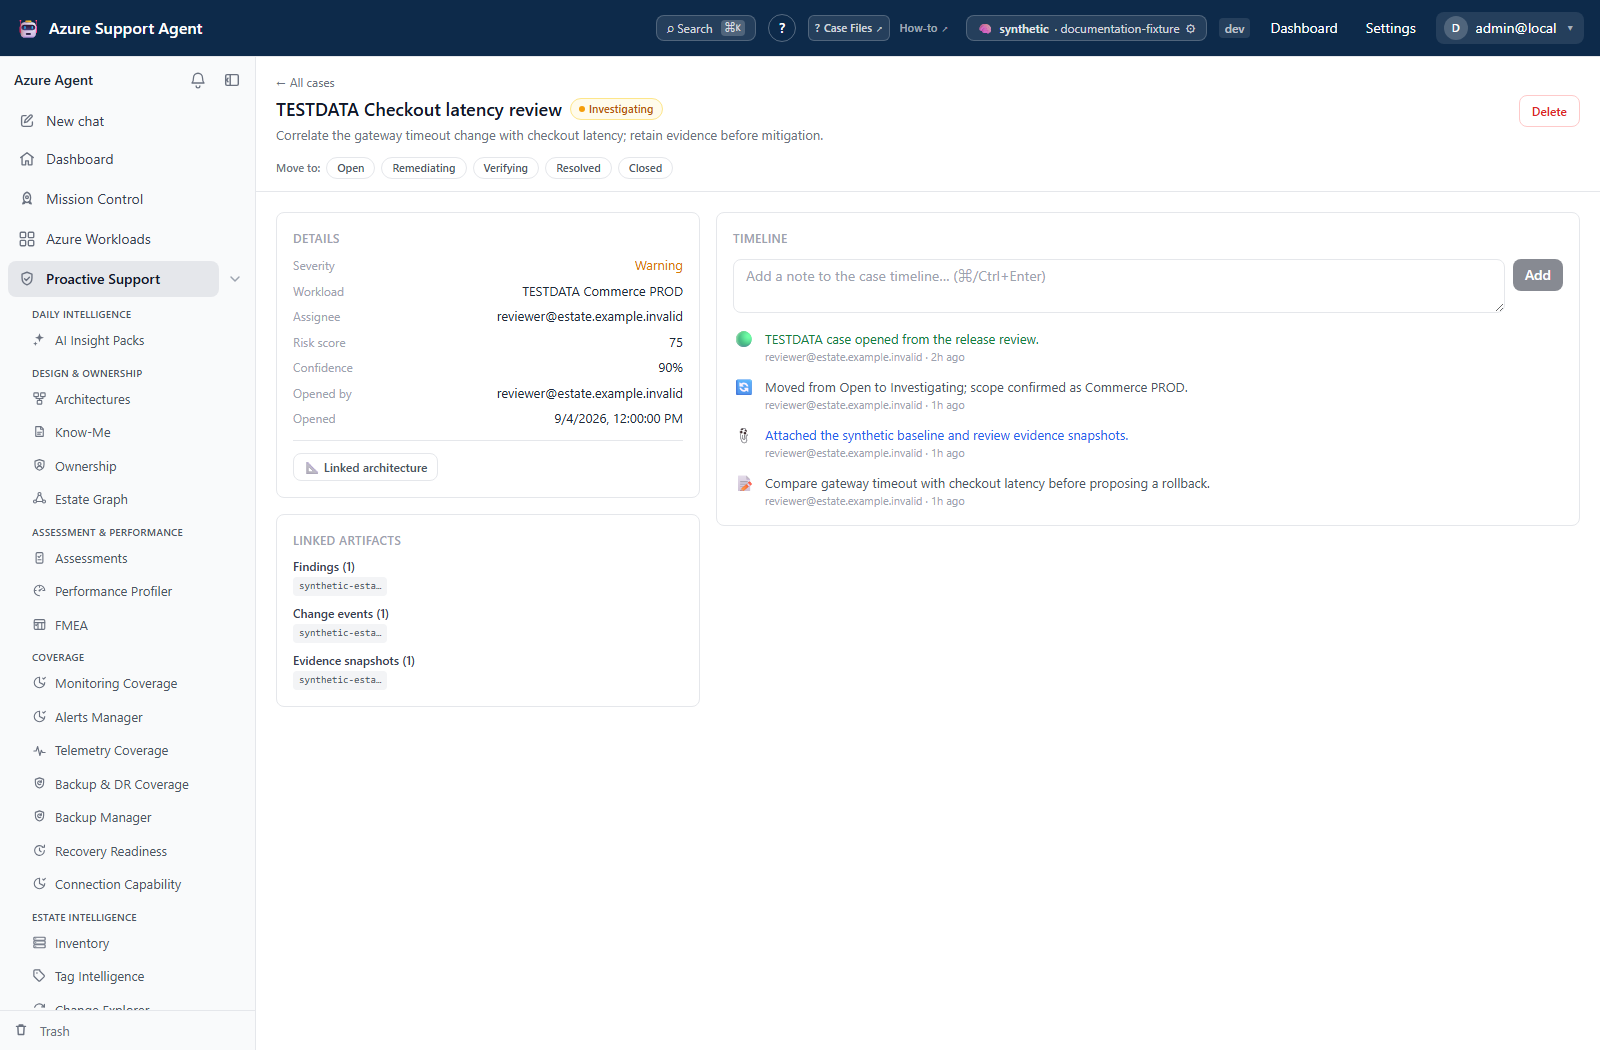
- Review Details and Linked artifacts. Workload, architecture, investigation links, assignee, risk/confidence, and structured verification are API/integration-populated metadata; this detail view has no metadata editor or attachment picker.
Expected result: A tenant-scoped case with an opening event and persistent notes.
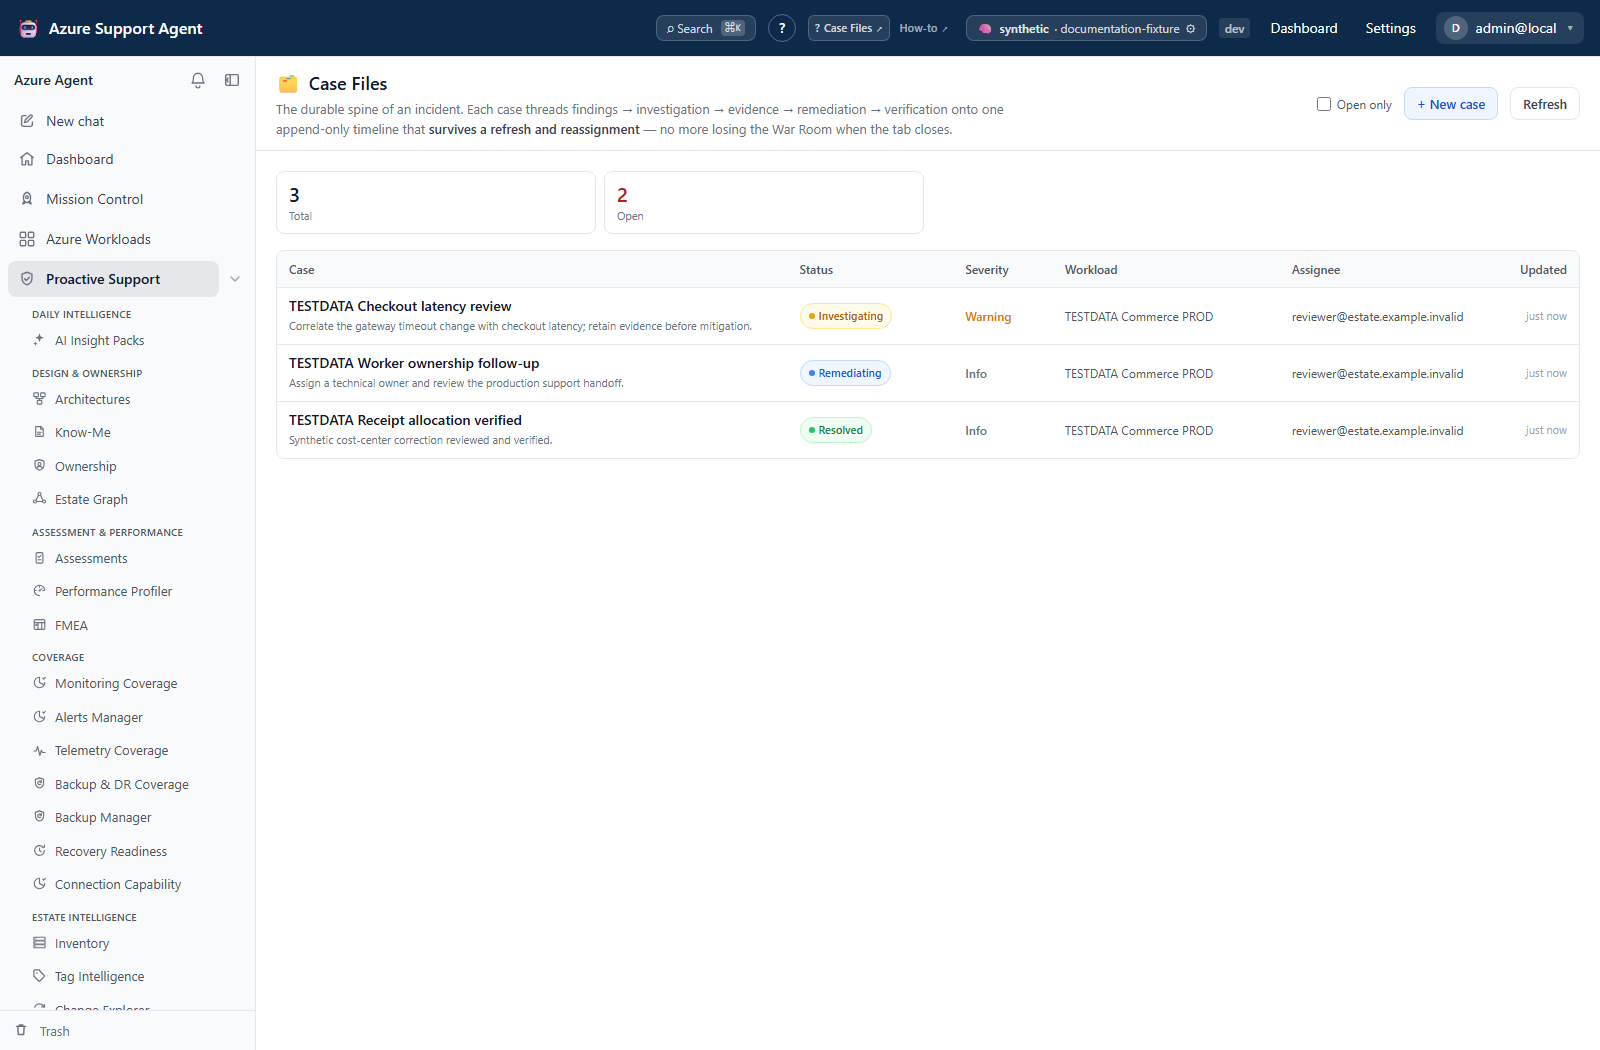
Verification: Reload the detail page and confirm the title, severity, actor, and notes. Refresh on the list reloads application records; it does not collect fresh Azure evidence. The list returns up to 200 cases, ordered by case update time, and Open only excludes resolved and closed cases.
How to progress and verify an investigation
The supported statuses are open, investigating, remediating, verifying, resolved, and closed. Severities are info, warning, error, and critical.
- Open the case created manually or by an investigation handoff, and record a non-sensitive summary in a note.
- Record an owner in the timeline. An authorized API integration can update the assignee and link workload, architecture, and investigation metadata; those references are not validated as existing same-tenant objects by the case store.
- Select Investigating under Move to and append notes rather than rewriting history.
- Record relevant finding UIDs, change-event IDs, and Evidence Locker snapshot IDs. Structured attachments use the case attachment API with
finding_uids,change_event_ids, orevidence_snapshot_ids; the UI displays these IDs rather than opening them as links. - Record the approved remediation and move to remediating.
- Capture fresh verification evidence and move to verifying.
- Resolve only when success criteria are met; close after operational follow-up is complete.
Status, severity, assignee, risk score, confidence, and summary can be updated through the API. Status changes and changed metadata produce timeline events with actor/timestamp context. The Move to buttons allow transitions in either direction; evidence, approvals, and completion of remediation are operational requirements, not backend prerequisites for resolving a case.
Expected result: Investigation, remediation, and verification decisions remain connected in one record without executing remediation from the case page.
Verification: Confirm the status and its timeline event after each transition. Resolving or closing sets the resolution timestamp; returning to an open state clears it and records reopening. Record the reason in a separate note.
Events include opened, status, note, attach, investigation, handoff, assigned, resolved, and reopened. Timeline events are append-only. Correct an error with a new note; do not rely on deletion to conceal a mistaken decision.
How to retain context before handoff or deletion
- Review the oldest-first timeline and the linked investigation. Open investigation opens the stored chat; Linked architecture opens the architecture library, not a specific canvas.
- Use the structured case detail API when an authorized integration needs metadata and timeline data. There is no Case Files download, upload, import, scheduling, or external-ticket creation control. Use Evidence Locker for a portable evidence bundle.
- Before deleting an erroneous case, preserve required context and check external references. The confirmation says the case and timeline will be permanently deleted, but the current backend sets a deletion timestamp and retains both in storage while hiding the case from list/detail reads.
- Treat deletion as unavailable for self-service recovery: Case Files exposes no Trash, restore, or purge endpoint/control. Do not use Delete as a retention purge or as an undo mechanism.
Expected result: Handoff preserves decision context; deletion hides the application case without deleting linked evidence, chats, remediation tasks, or external tickets.
Verification: A deleted case disappears even with Open only cleared, and its former detail URL is unavailable. That confirms hiding, not physical erasure. Refer recovery or retention requests to the application administrator; no automatic restoration is promised.
Case detail is available as structured API data. Evidence exports remain governed by Evidence Locker controls. External ticket references are pointers, so verify that both systems contain enough context without duplicating secrets or personal data.
Troubleshooting
| Symptom | Cause and resolution |
|---|---|
| Case is absent | Open only hides resolved/closed cases; clear it. Deleted cases remain hidden, and the list is capped at 200. Check a known detail URL for a non-deleted case. |
| Attachment request fails | The API accepts only the three named attachment fields and requires an accessible case plus cases.write. Correct the field/permission; separately verify each source ID because accepted attachment strings do not prove source existence. |
| Assignee cannot be selected | There is no assignee picker here. Record ownership in a note or use an authorized case-metadata integration; refreshing Access Control will not add a picker. |
| Status or note does not persist | Confirm cases.write, then reload to establish whether the earlier request succeeded before repeating it. A button being visible is not authorization. |
| Timeline appears wrong | Compare absolute timestamps and client time zone; events are ordered by creation time. Adding a note does not itself update the list’s case-update timestamp. |
Screenshot walkthrough
These synthetic browser fixtures illustrate case triage and record review, not a live incident or verified remediation. The new-case example is an unsaved draft; Open case was not submitted.
1. Locate the investigation in the queue
2. Prepare a focused case draft
3. Review decisions alongside linked artifact references